Jekyll-Indieweb and Micropub
With jekyll-indieweb, posting to your static Jekyll site from a mobile device is easy after initial setup.
We can do that with voxpelli’s webpage-micropub-to-github which accepts a post from any micropub compatible client like quill and converts the post into a jekyll-friendly git commit including the yaml front matter and content.
If we try to sign into quill prior to setting up the micropub endpoint, these error messages will be returned.
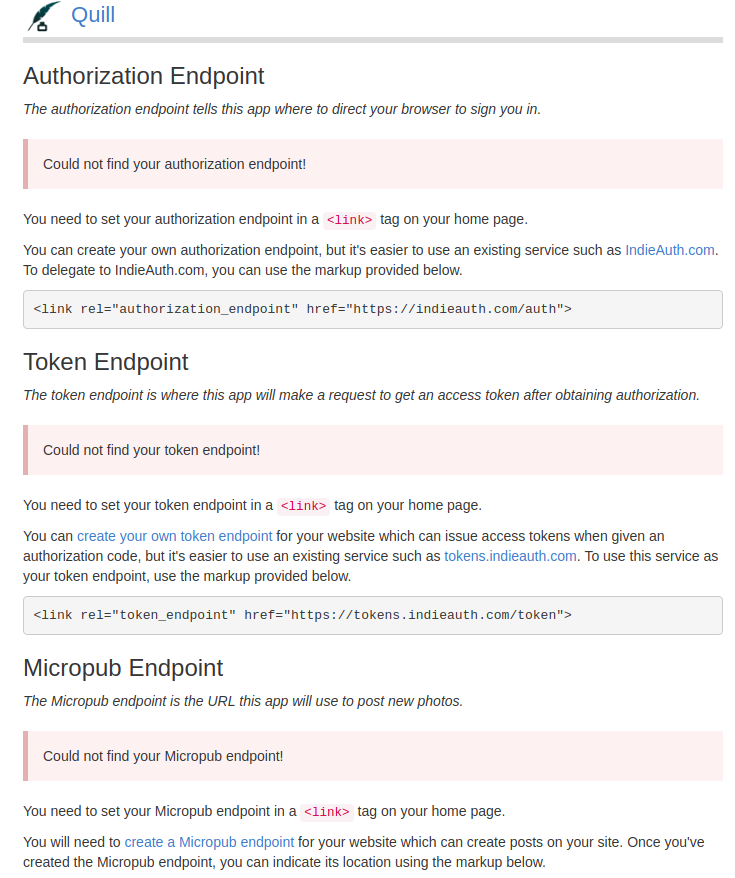
This means that our jekyll site does not include any links to indieauth endpoints nor a link to a micropub endpoint. Before we can link to a micropub endpoint, we need to deploy our micropub endpoint (webpage-micropub-to-github). One way to deploy webpage-micropub-to-github is to use the Deploy to Heroku button (found on its project page) which will present you with environment variables that need to be configured. You might prefer deploying from the command line with a heroku create, git push and a heroku config:add for each environment variable. Either one works.
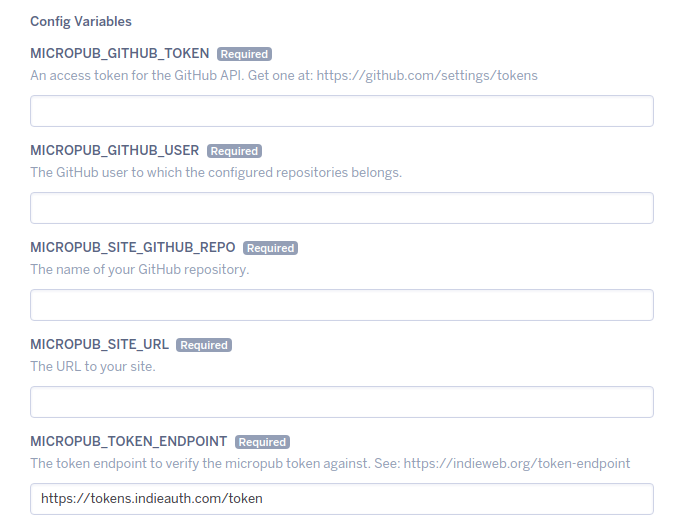
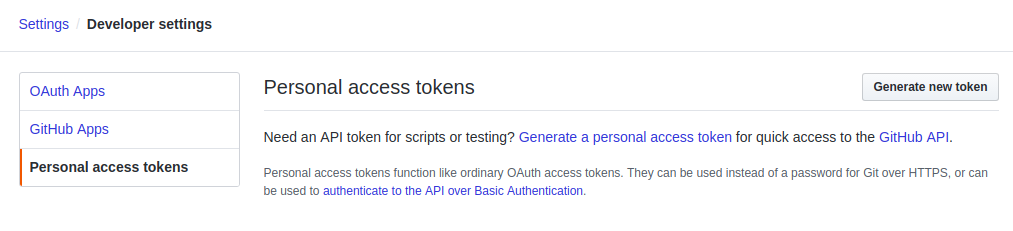
The first variable MICROPUB_GITHUB_TOKEN requires generating a new access token by visiting https://github.com/settings/tokens. This token will authorize webpage-micropub-to-github to push a new commit to your jekyll repo when you make a post from a micropub client (like quill).
Assuming your jekyll repository is public, make sure to check the public_repo scope. Otherwise, you will receive an ambiguous “Your endpoint did not return a Location header” error when you attempt to make a post.

The other four env variables are simpler. MICROPUB_SITE_GITHUB_REPO is just the name of your repo.
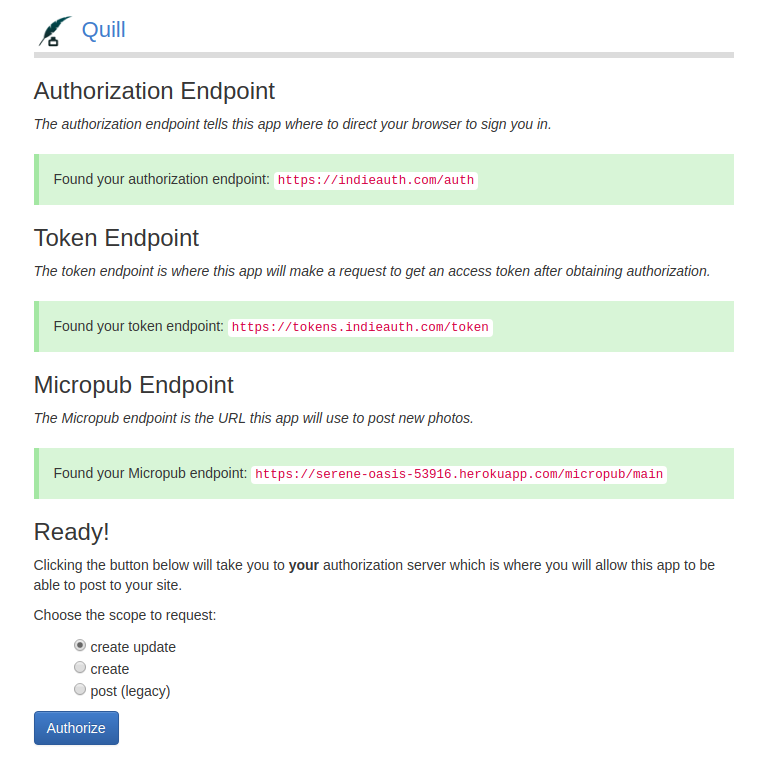
At this point, you have deployed webpage-micropub-to-github to heroku either by command line or deploy button, so those links on your jekyll site that quill is looking for can now be added to your _layouts/default file.

Now, when you sign into quill, you should receive this success message.
When you click authorize, the indieauth process begins. If you have not added a rel-me link on your site to twitter (or github) with a link back from twitter (or github) to your site, you will receive an error message.

Luckily, this is easy as your jekyll site’s rel-me links are generated from the _config.yml file when you specify twitter_username and/or github_username.
When you post to your site from quill, don’t be surprised if receive “Page not found” because your browser redirected you before your jekyll repo updated your site.

Now you can make posts (with images) from your mobile device to your jekyll site! It’s not too difficult to have your location displayed in the footer of your post as I do from time to time like this post from the Sharks game.